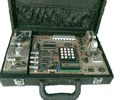

Microcontroller Kits
Programmer and Target 89s51![]()
Simple Mikrokontroller 89s51 Trainer
Standart
Mikrokontroller 89s51 Trainer![]()
Super Mikrokontroller Trainer 89s51
All Item Include
ISP AT89SXX Programmer through the PC USB port
by: Todor.topolov
As a logical extension to my RS232 AT89S52 ISP programmer, I developed this one – also for AT89S52, but communicating with the PC through the USB port. Its advantages are obvious – the USB port. Parallel port based programmers are quite universal, but have one serious problem – the differences between different paralel ports. This is why such programmers do not work with certain PCs, especially newer ones. As I could not find a good working programmer for the AT89S52 micro, I developed the 89S52prog – a programmer, using the RS232. As USB is much more convinient and faster, I later set myself on doing this one. It offers almost the same functionality, but operates on the USB. As it is a new release, I would like to receive feedback on it – “we’d like this or that”, “I don’t like the GUI”, “there’s a bug reading…..blabla”, or just “10x man”. Any of these will be appreciated. Have no doubt that I will assist with any issues, when trying to get it working, as I have done with the RS version (and still do). My e-mail is [email protected]
The programmer requires Windows XP.
Now, the schematics. The programmer is based on AT89C5131 – another 8051 micro from Atmel, but this time with a full speed USB function and 1KB on chip xram. Another good thing about it is that it can be programmed serially via the USB, so you do not need a programmer for it, unless you plan to lock it. All you need to do is explained in its datasheet. For those, who hate reading, I will only mention, that you should download Atmel Flip and follow the instructions. As for the schematic of the board, it is as simple as could possibly be. I recommend using the extended-voltage-range version of the AT89C5131 (2,7-5,5V), so you don’t need a voltage regulator and a transistor on the RESET pin. I wasn’t that lucky, though, and only managed to find the already mature 2,7-3,3 volt version of the micro. This is why I had to place a transistor on the RESET pin of the 89s52 micro (the other pins can operate as is) in order to have a 5V level instead of 3,3V one. The AT89S5131 uses its hardware SPI port to program the micro and as a chip select (RESET) pin – a general-purpose I/O pin. The Atmel datasheet explains how to set up the USB connections, so I will only go throught those between the AT89C5131 and the AT89S52. They are shown on the schematic below.
The programmer is ISP, which means you can use it without even taking the micro off its destination board, but by just connecting it to the target ISP port. Easy, huh?
The programmer takes bin files as input, so the use of hexbin.exe could be necessary.
Download File :
usbprogrammer.hex
If you don’t have MFC installed, you should also download these dlls and extract them into the system32 folder.
Comments, questions and discussion about this topic